September Maintenance week 2019

Throughout the week of September 9th 2019, we will be performing maintenance on DataYard’s infrastructure and customer servers. This will include performing updates to all managed server infrastructure, including tasks that require reboots/shutdowns/service interruptions.  Maintenance will begin at 2:00AM EST and will be completed by 8:00AM EST throughout various days this week. Making IT Better!

Let us know if you have any questions, concerns, or just want to chat: 1.800.982.4539 or [email protected]. Remember to follow us on Twitter (@datayardtechops & @datayard)!

August Maintenance week 2019

Throughout the week of August 12th 2019, we will be performing maintenance on DataYard’s infrastructure and customer servers. This will include performing updates to all managed server infrastructure, including tasks that require reboots/shutdowns/service interruptions.  Maintenance will begin at 2:00AM EST and will be completed by 8:00AM EST throughout various days this week. Making IT Better!

Let us know if you have any questions, concerns, or just want to chat: 1.800.982.4539 or [email protected]. Remember to follow us on Twitter (@datayardtechops & @datayard)!

July Maintenance week 2019

Throughout the week of July 8th 2019, we will be performing maintenance on DataYard’s infrastructure and customer servers. This will include performing updates to all managed server infrastructure, including tasks that require reboots/shutdowns/service interruptions.  Maintenance will begin at 2:00AM EST and will be completed by 8:00AM EST throughout various days this week. Making IT Better!

Let us know if you have any questions, concerns, or just want to chat: 1.800.982.4539 or [email protected]. Remember to follow us on Twitter (@datayardtechops & @datayard)!

June Maintenance week 2019

Throughout the week of June 10th 2019, we will be performing maintenance on DataYard’s infrastructure and customer servers. This will include performing updates to all managed server infrastructure, including tasks that require reboots/shutdowns/service interruptions.  Maintenance will begin at 2:00AM EST and will be completed by 8:00AM EST throughout various days this week. Making IT Better!

Let us know if you have any questions, concerns, or just want to chat: 1.800.982.4539 or [email protected]. Remember to follow us on Twitter (@datayardtechops & @datayard)!

May Maintenance week 2019

Throughout the week of May 13th 2019, we will be performing maintenance on DataYard’s infrastructure and customer servers. This will include performing updates to all managed server infrastructure, including tasks that require reboots/shutdowns/service interruptions.  Maintenance will begin at 2:00AM EST and will be completed by 8:00AM EST throughout various days this week. Making IT Better!

Let us know if you have any questions, concerns, or just want to chat: 1.800.982.4539 or [email protected]. Remember to follow us on Twitter (@datayardtechops & @datayard)!

April Maintenance week 2019

Throughout the week of April 8th 2019, we will be performing maintenance on DataYard’s infrastructure and customer servers. This will include performing updates to all managed server infrastructure, including tasks that require reboots/shutdowns/service interruptions.  Maintenance will begin at 2:00AM EST and will be completed by 8:00AM EST throughout various days this week. Making IT Better!

Let us know if you have any questions, concerns, or just want to chat: 1.800.982.4539 or [email protected]. Remember to follow us on Twitter (@datayardtechops & @datayard)!

How do I modify the Hosts file on my PC?

How do I modify the Hosts file on my PC?

How to modify your computer’s Hosts file.

Much like DNS, your computer’s Hosts file associates IP addresses to host names. You may not always have control over DNS, but you can always have control over your Hosts file. The Hosts file can be used to resolve domain names without the use of DNS.

Why you would want to make changes to the Hosts file:

  • to preview websites in development
  • to do network testing
  • to increase browsing speeds (by bypassing the DNS query process)

Most hosting platforms don’t offer a “site preview” tool for website development. So, for further explanation of the Hosts file, I’m going to use the development scenario as an example of how to use it.

For example, you have your website loaded on a development server, but want a way to preview the site to ensure all the changes are working properly before changing the DNS and taking the site live.

You would first open your hosts file to point the domain name to the development server’s IP address.

This is how it’s done on a Windows 7 operating system:

  • Open the Start menu, go to Accessories, then find the program Notepad.
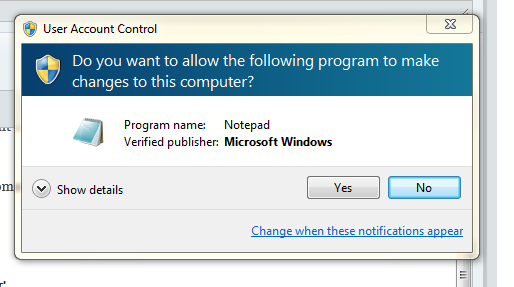
  • Once you’ve located Notepad, right-click on the icon and choose ‘Run As Administrator’
  • You will likely get the following message, you will want to select ‘Yes’

123

  • From inside the Notepad program you will go to My Computer, then Local Disk ( C: ) Then Windows, Then System32, Then Drivers and finally the folder etc.

123hosts

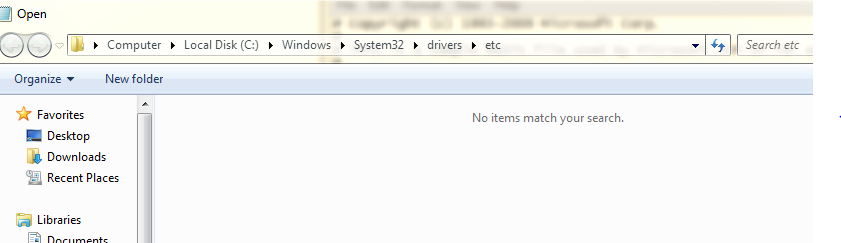
  • You will notice it says ‘no items match your search.’ At the bottom of the screen type “Hosts” where it says File Name: and this will allow the file to open in notepad.

123hosts2

  • Your screen should show the following information:

# Copyright (c) 1993-1999 Microsoft Corp.
#
# This is a sample HOSTS file used by Microsoft TCP/IP for Windows.
#
# This file contains the mappings of IP addresses to host names. Each
# entry should be kept on an individual line. The IP address should
# be placed in the first column followed by the corresponding host name.
# The IP address and the host name should be separated by at least one
# space.
#
# Additionally, comments (such as these) may be inserted on individual
# lines or following the machine name denoted by a ‘#’ symbol.
#
# For example:
#
#      102.54.94.97     rhino.acme.com          # source server
#       38.25.63.10     x.acme.com              # x client host

  • You will then add the IP address of the development server to the bottom of the Hosts file, hit “Tab” on the keyboard, and then add the host name(s). This is what the final Hosts file would look like for this scenario:

# Copyright (c) 1993-1999 Microsoft Corp.
#
# This is a sample HOSTS file used by Microsoft TCP/IP for Windows.
#
# This file contains the mappings of IP addresses to host names. Each
# entry should be kept on an individual line. The IP address should
# be placed in the first column followed by the corresponding host name.
# The IP address and the host name should be separated by at least one
# space.
#
# Additionally, comments (such as these) may be inserted on individual
# lines or following the machine name denoted by a ‘#’ symbol.
#
# For example:
#
#      102.54.94.97     rhino.acme.com          # source server
#       38.25.63.10     x.acme.com              # x client host
64.56.96.23         donet.com
64.56.96.23         www.donet.com

  • Now, just save the Hosts file and browse to the site. Your system will bypass DNS for that domain name and only pull content from the server you specify, basically showing you how that site would behave if the DNS records were pointing to it.

I should note that if you try this exact example, you will not see a difference in the Donet website as this is the current location of the site hosting.

If you have any questions please, contact DataYard Support.

How can I transfer my Domain Name to DataYard?

How can I transfer my Domain Name to DataYard?

Steps to take to transfer your domain name do DataYard’s registrar, Tucows.

Transferring your domain name to DataYard for management is a very simple process. While DataYard is not a registrar, we do work closely with one, Tucows. This allows us to maintain management of all of our customers’ domain information.

Steps to transfer your domain to DataYard’s registrar:

  1. Access your online account for your current registrar or contact them in order to complete the following:
  • Obtain the transfer authorization code (often called an EPP code)
  • Unlock the domain (sometimes referred to as a “transfer lock” or “domain protect”)
  • Ensure that the administrative contact email address is accessible (if not, change it to an address that is accessible)
  1. Contact DataYard support and ask us to initiate a transfer for your domain name
  2. DataYard will then initiate the transfer, and the administrative contact email address will receive a transfer request
  3. The administrative contact must click on the approval link in the transfer request email, enter the authorization code into the appropriate field, and select “approve” within 24 hours or this link will no longer be valid.
    *If you are unable to respond to the email within 24 hours please let DataYard staff know so we can re-initiate the transfer, which will send a new email to the administrative contact.
  4. The domain automatically transfers in the background within one week, and you will not experience any service interruptions.

Important: If you do not have access to the current administrative contact email account, please note that some registrars will lock your domain for 60 days if you change any contact information. If you have to change the administrative email address in order to receive the transfer requests, you may not be able to transfer the domain immediately.

How can I direct multiple domain names to my site?

How can I direct multiple domain names to my site?

Who you call to configure multiple domain names to point to one website will vary depending on who your domain is registered through and where it’s hosted. If they are in the same place, it makes this process rather simple.

First, each domain will need to be registered and have DNS hosting setup. Generally, this is done with the same company that provides hosting for your website.

These are the basic steps you will need to take to direct another domain to your website:

  • Register domain name – You can register this domain with any registrar that you choose. However, as I mentioned earlier, it’s easiest to register it with the same company that is doing the hosting for the website. If you wish to register this domain through Tucows, please contact our sales department at 937-226-6896 and they will help you get it registered.
  • Point the new domain name to the proper name servers – Name servers are what connect your domain name to your DNS hosting for that domain. You should have already setup DNS service with your hosting provider and know where to point these.
  • DataYard Name Servers are:
    • dns1.donet.com
    • dns2.donet.com

If you are logged into the Tucows web portal and are managing your name servers, you will go to Name Servers

And then enter the name servers, one per line.

Once complete, hit Save Configuration.

Point the domain name to the same IP as your main website – DNS should already be setup with your hosting provider. They will just need to know the IP address of your main website (the primary Address record also points to this). If they are also providing the hosting for the main website they probably already know this information.

Call the hosting provider to set up the alias on the server-side- The last step is to call the hosting provider (if not the same as above) and have them setup a server alias for the new domain.