
What steps should I take if I choose to switch from POP to IMAP?
The steps needed to switch your account from POP3 to IMAP.
When switching your account from POP to IMAP, you want to make sure that you don’t lose any important information during the transition. This blog will show you the easiest way to make the change and give you all the little details you need to watch to make sure nothing is lost in the process.
The first thing you want to do is make sure you have a recent backup of the file your email is stored in just in case something goes wrong. If you’re not sure how to make a backup, start here: How do I backup my Outlook 2010 client?
Once your backup is complete, you are ready to begin making the switch!
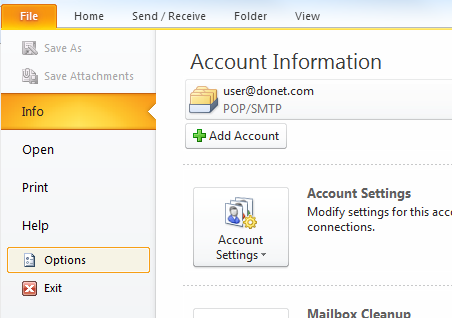
Open your Outlook client and choose the File tab from the top left hand side of the screen.
Next, select Options from the bottom of the list.
From the Options Screen you will choose Advanced from the menu on left hand side of the screen, scroll down a bit and you will click the send/receive button.

Select All Accounts and then click Edit.
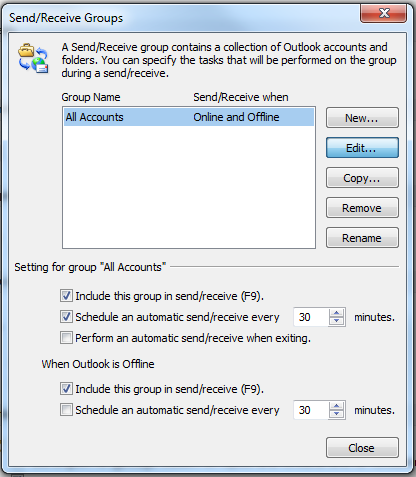
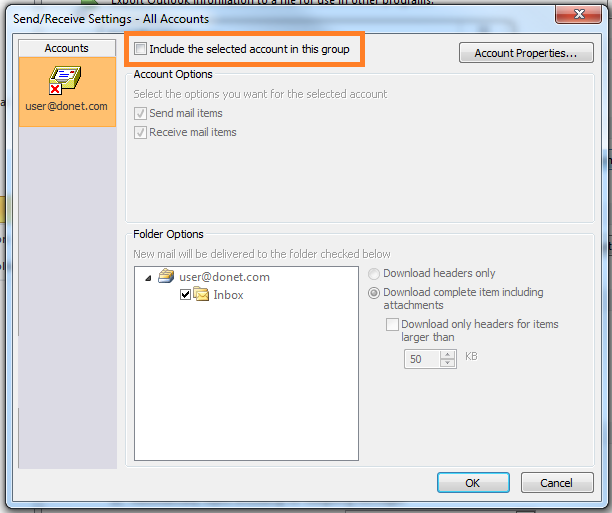
Select your POP account on the left side and uncheck the box next to “Include the selected account in this group.” If you have more than one send/receive group, make sure that your account is disabled under the other groups as well.
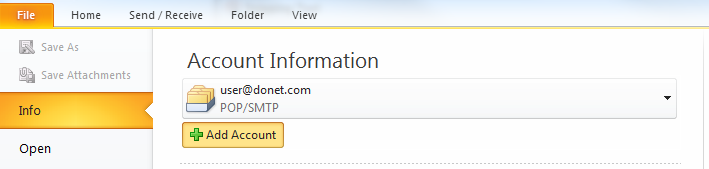
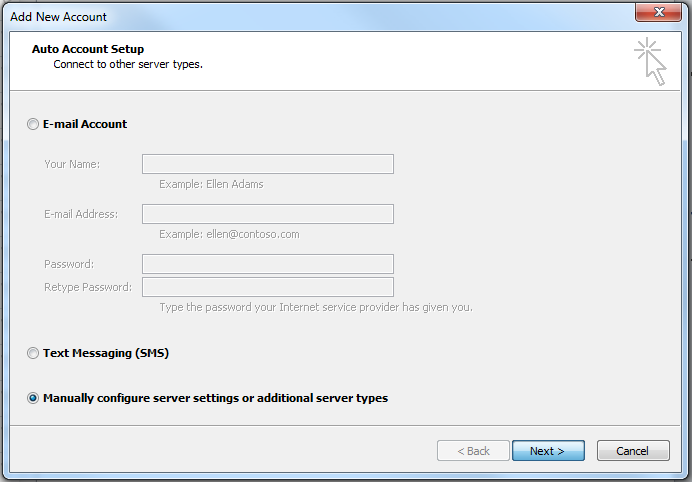
Now that your POP account is disabled from the send/receive group, you can add in the IMAP account. Select File>Add Account.
In the new window select Manually Configure Server Settings or additional Server Types.
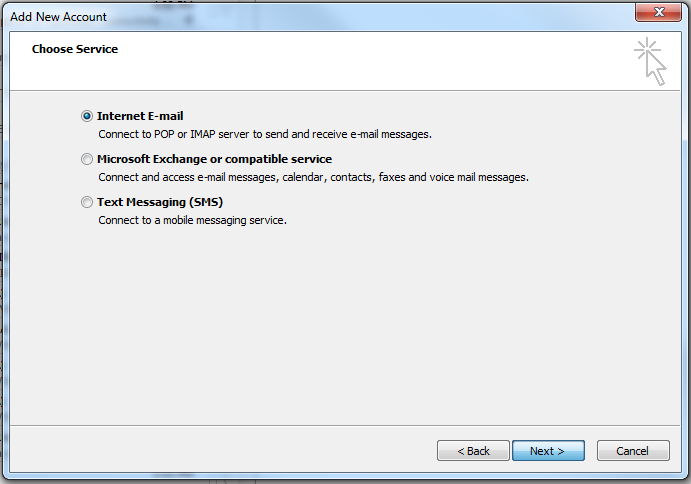
Select Internet Email and hit Next.
Complete the following information for the NEW account.
- Your Name: Name
- Email Address: Your full Email address
- Account Type: IMAP
- Incoming Mail Server: imap.donet.com
- Outgoing Mail Server: smtp.donet.com
- User Name: Your Username
- Password: Your email password

In the new window, select the Outgoing Server tab at the top and check “My outgoing server (SMTP) requires authentication” and use same settings as my incoming mail server.

Click on the Advanced tab, and change the outgoing server port number to 587. Then click OK. In the remaining “Add New Account” window, click Next followed by Finish.
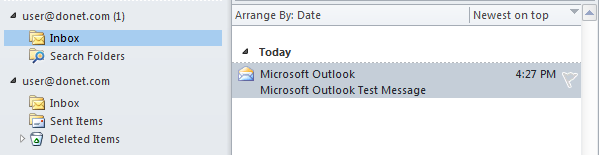
Now, on the left Outlook menu (where your accounts and folders are listed), you should see both the POP and IMAP accounts listed. The account with the “(1)” next to it is the new IMAP account.
In order to make sure you don’t lose any of your messages and can access them all under the same folder, click on the POP account (the one without the “(1)” next to it) and either select the folders and drag them to the IMAP account or select all of the messages (CTRL + A = select all) and drag them to the IMAP account.
For this example, I selected all of the messages in the inbox of the POP account and dropped them in the inbox of the IMAP account.
Once your mail has all been copied from the POP account to the IMAP account, you can remove the POP account.
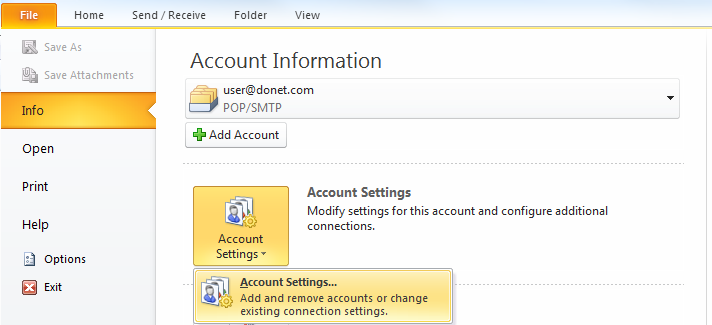
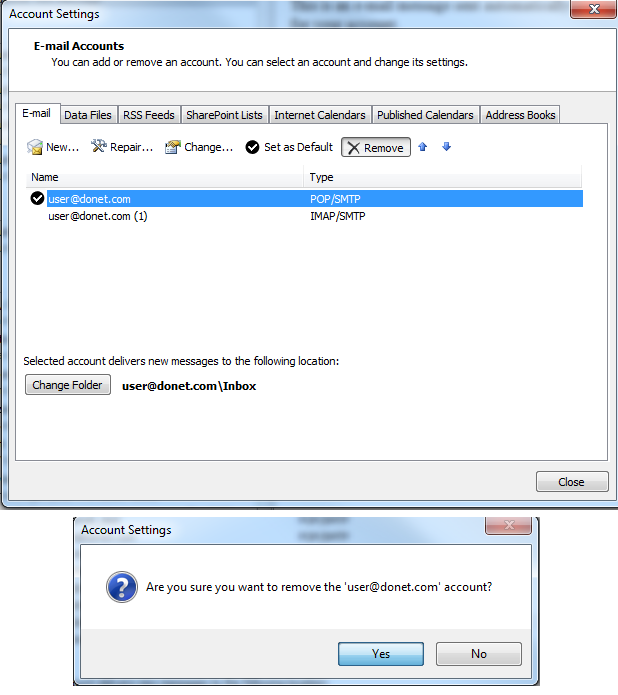
To do this, first click on File followed by Account Settings.
Next, select the account under the Email tab that says “POP/SMTP” under “Type,” and click Remove. Click Yes in the pop-up removal confirmation window.
Back at the Home page of Outlook, on the left mail menu, right click on the POP account (the one you removed in the previous step that does not have the (1) next to it) and select Close [email address].

You have now successfully switched from using POP to IMAP.

